How to Add a Dropdown Sub Menu Navigation to your Squarespace Website
When designing a website, we highly recommending keeping it simple and concise, whether it’s your content or amount of pages found in your navigation. You’ll notice most of our website templates have a HOME plus five inner pages and when you start adding more to your navigation, it begins to feel overwhelming. Luckily, Squarespace allows us to add in dropdown menus for you to organize your pages, whether you want to breakdown more of your services, galleries, or even shop or blog categories!
We’re going to breakdown how simple it is to create these dropdown menus for you !
MAKE SURE TO FOLLOW THE NECESSARY STEPS FOR SQUARESPACE 7.1 OR 7.1!
Step One. Add Folder.
SQUARESPACE 7.1
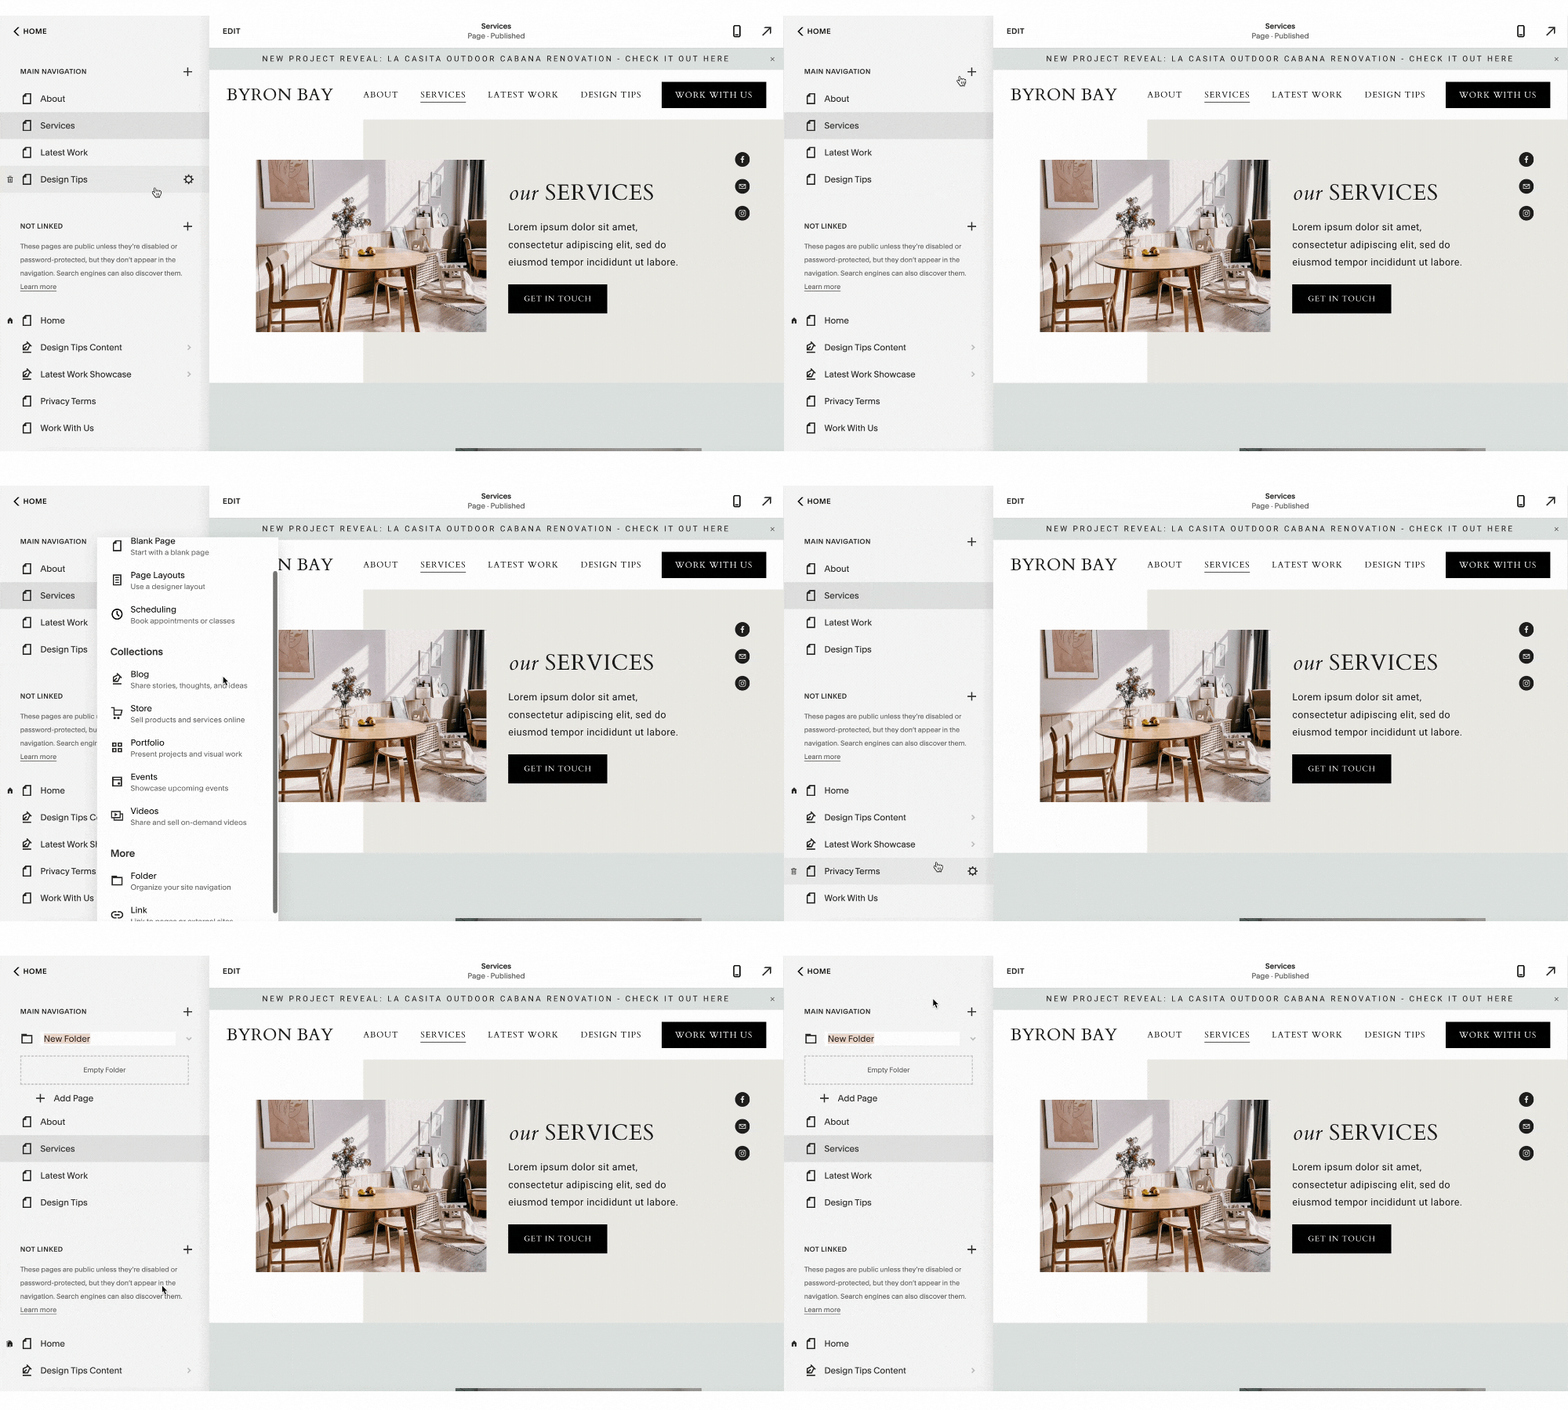
While in PAGES, under Main Navigation, click the + sign to add a FOLDER (under MORE).
SQUARESPACE 7.0
While in PAGES, under Primary Navigation (or Secondary, depending on the set-up), click the + sign to add a FOLDER (under OTHER).
Step Two. Rename Main Navigation Item.
SQUARESPACE 7.1 + 7.0
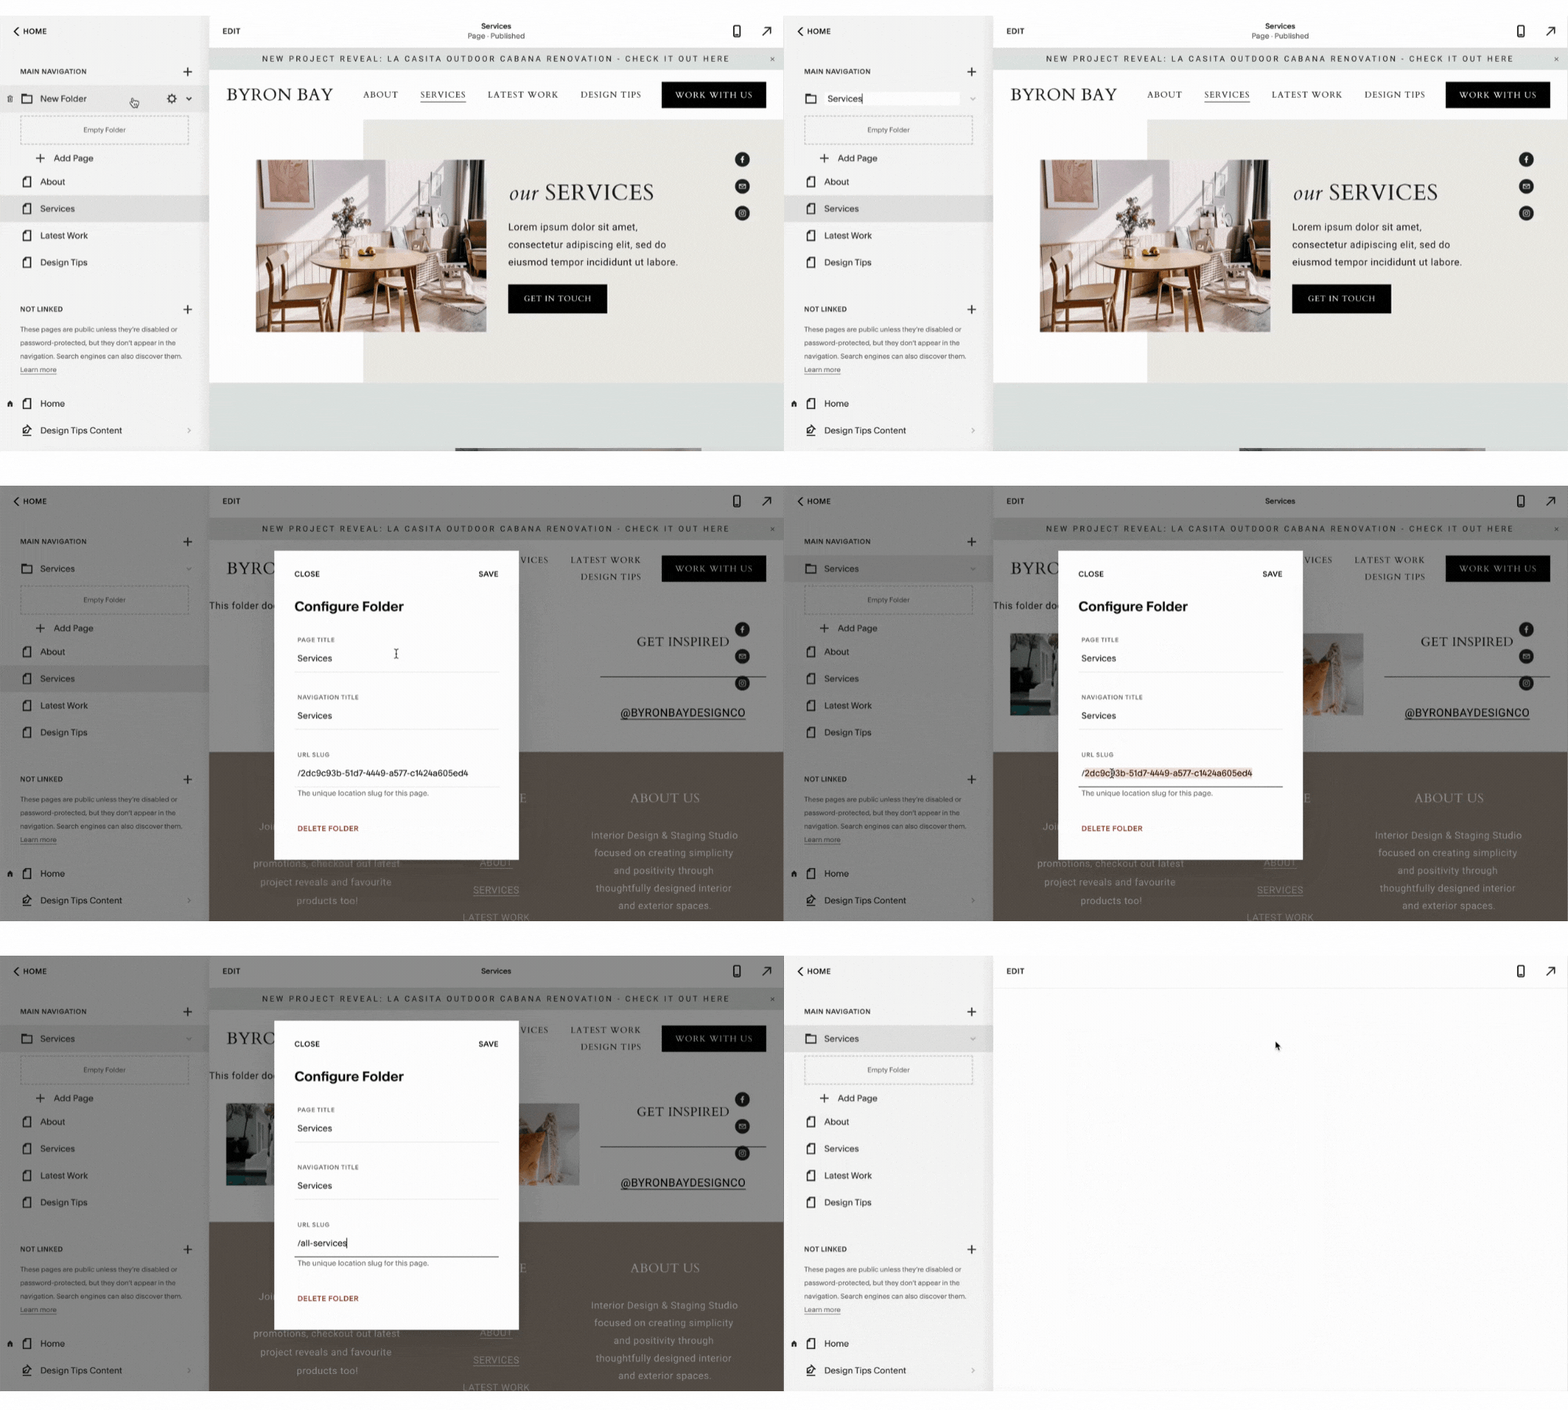
Add your PAGE TITLE and NAVIGATION TITLE to the folder (ex. SERVICES).
PRO TIP: You’ll also want to give this navigation item a url slug, however, this isn’t an actual page so if you have a services page with the url slug /services, we recommend doing something a bit different like /all-services for your folder url slug.
Step Three. Add Sub Menu Items
SQUARESPACE 7.1
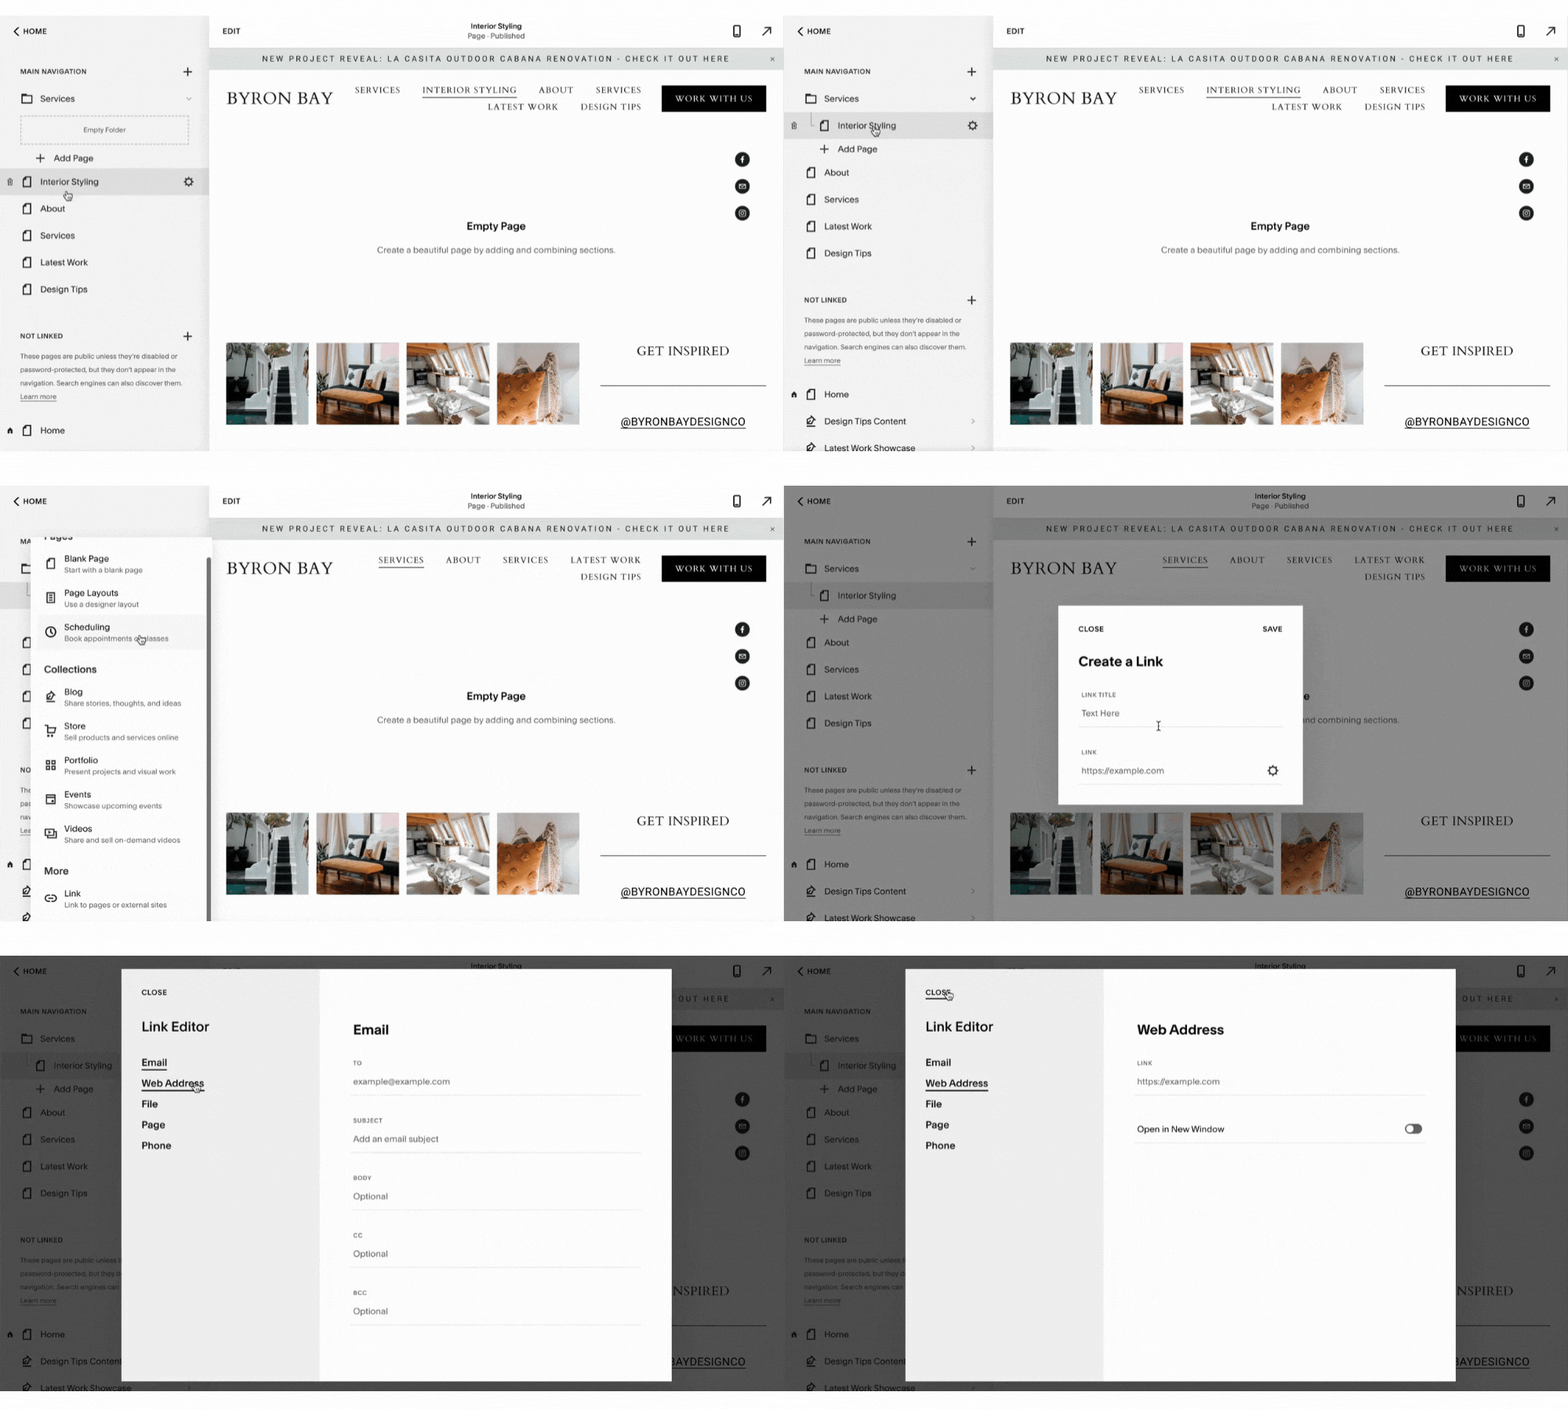
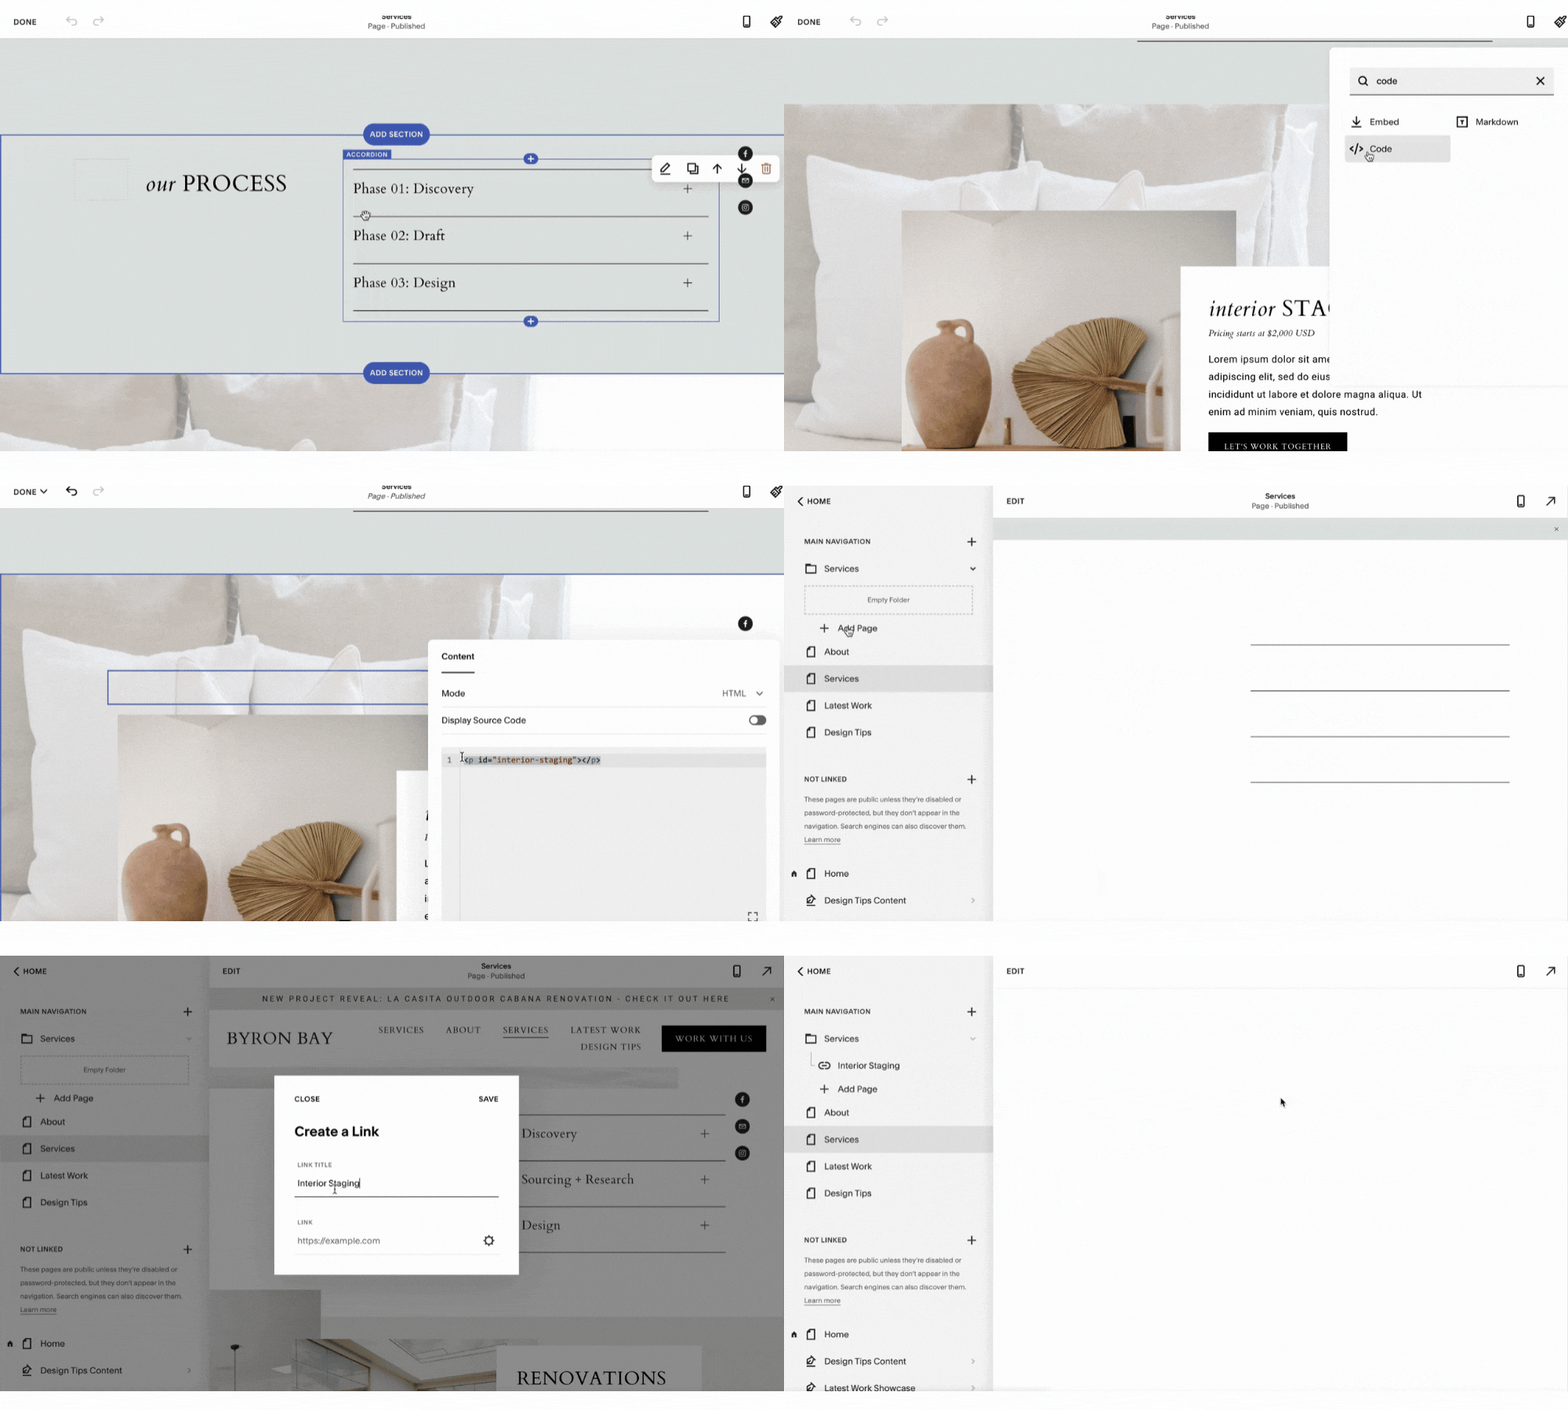
Drag and drop your pages below the FOLDER in whichever order you’d like. You can also add in the LINK option for either pages or external links.
SQUARESPACE 7.0
If you are using any of our website templates, your website is likely using INDEX PAGES. You’ll first want to drag and drop these INDEX PAGES to your NOT LINKED. From there, you’ll add in the LINK option and link to your INDEX PAGE or an external link as well.
PRO TIP: In Squarespace 7.0, when you click your main FOLDER link, it will direct you to the first sub menu link, so consider this when organizing. For example, if you are setting up SERVICES and have a main services page, set that up as your first sub menu labelled ALL SERVICES.
Step Four. Option To Add Categories
SQUARESPACE 7.1 + 7.0
If you’d like to organize your sub-menus by different categories, such as your blog or shop, add a LINK option and search for the BLOG or SHOP collection (with the specific icons). From there, you have the option to link to a specific category!
Step Five. Option To Anchor Links
SQUARESPACE 7.1 + 7.0
If you’d like to add navigation items that “jump” to a specific part of a page (for example if you have only one services page, but each service has it’s own category and you’d like to showcase that in the navigation!)
This involves a little bit of code, but you’ll copy it below and add a CODE block above that section on your website. Then update the name-of-section to match your content.
<p id="name-of-section"></p>
From there, you will add a LINK below your FOLDER and add the page, followed by a # an name-of-section.
Example: /services#name-of-section
or /services#interior-staging
Step Six. Stylize
SQUARESPACE 7.1 + 7.0
Don’t forget to jump into your website’s site styles to make sure your sub menu styling is set up as you’d like and also looking at it on mobile view!
After that, you should be all set up with your navigation!
Looking to get your website launched?
Our Squarespace website templates may be the right fit for you! Our DIY option allows you to play and plug your content and get you launched pronto!

